WooCommerce images are inalienable for appealing and customer-oriented catalog creating. When you need to visualize lots of product pages in WooCommerce you won’t deny the opportunity to perform WooCommerce image import and bulk assign them to products within short span of time.
You can perform a batch import of WooCommerce images through a CSV import with Store Manager for WooCommerce. This tutorial provides step-by-step explanation on a whole process of image uploading via WooCommerce Store Manager.
To upload images to WooCommerce, you should store them in the import file for each of products uploaded.
Our aim is to assign locally stored WooCommerce images to already existing at WooCommerce merchandise. The import file, depicted at the screenshot below, contains our test products. Each of products has Featured image and Gallery images. Since we import images from the local folder, we have specified image names only.
WooCommerce featured image is the main photo of your item. It displays at the category page, in related products, up-sells section etc.
Product gallery images are all the images attached to products beside the Featured image that add extra view of WooCommerce products you are selling.
If you import remote pictures, specify full http:// link to them in the import file, for example http://testsite.com/imagename.jpg. Whenever images are in Media Library, you need to specify Media Library path in image column of the import file, like 2016/06/gucci_perfume.jpg. As you know by default images are stored in year and month-based folders under wp-content/uploads directory at the FTP, for example, images uploaded in June, 2016, will be stored in wp-content/uploads/2016/01.
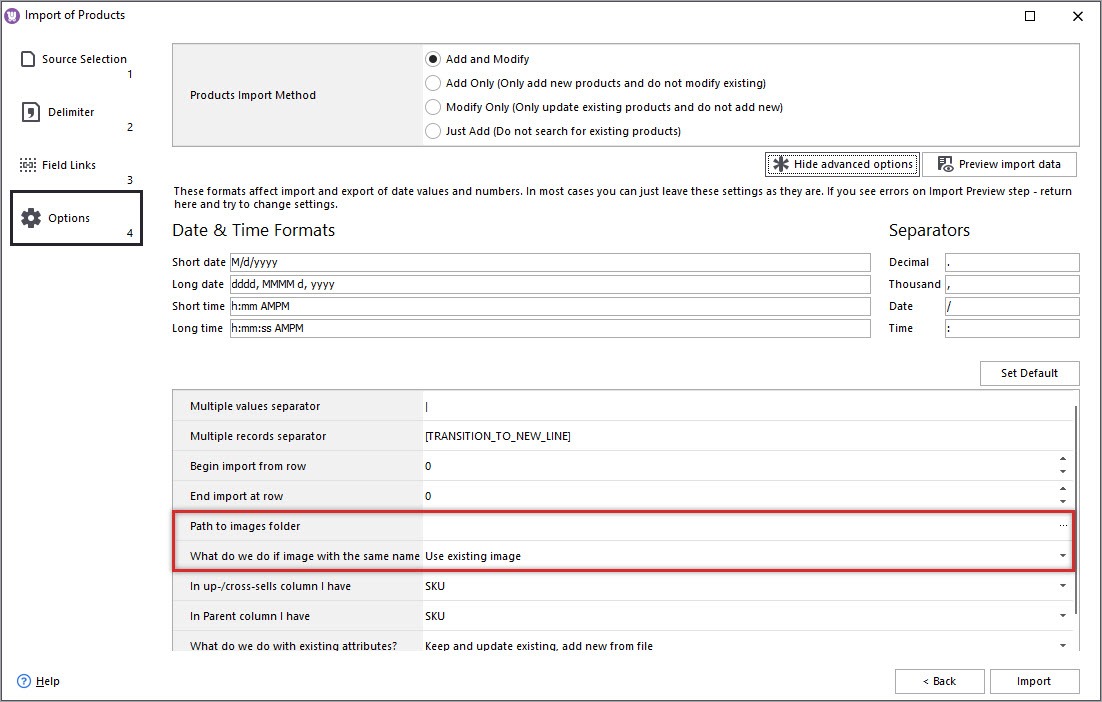
Importing products via flexible WooCommerce import wizard you are expected to configure settings responsible for photos to get them allocated to necessary items and displayed at the storefront.
Make sure you have linked image columns of the import file with suitable database fields Featured Image and Product Image Gallery and set correspondence, otherwise images will not be attached to desired products as it is configured in the file.
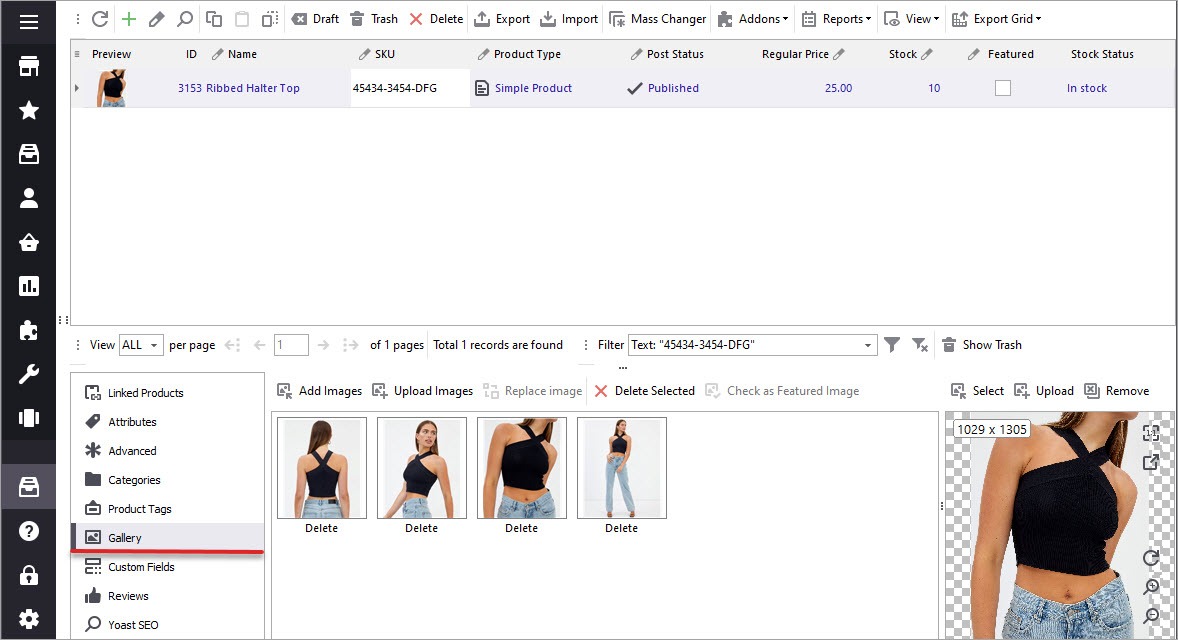
Once the settings are configured, confirm the procedure. Afterwards check the results in Store Manager and at the frontend. Images will display in Gallery tab in product grid and in Media Library.
Bulk image upload to WooCommerce makes catalog handling more approachable and less time-consuming. Rely on Store Manager import functionality to simplify image handling.
What table are the gallery images assigned to?
Hello Echo,
If you mean database tables, then Store Manager supports the default logics of WooCommerce itself and assigns images to products as in the admin panel.
If, for example, you want to find the image assigned to a product, then in the Store Manager open Raw Table Editor, go to the table “Postmeta” and filter post ID according to the product ID. Posts with images will be displayed there. If your question is more specific, kindly provide us the details, so we could give you more precise answer further.